Showing posts with label Works In Progress. Show all posts

Saturday, March 14, 2009

Daz Studio - V3-Short Dress


Here is something that I am currently working on. The 3D program that I am using here is DazStudio which I got as a free download.

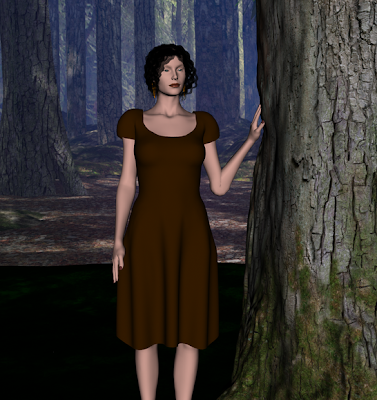
Basically what you see here is the Victoria 3 model - which came with Daz Studio. The earrings I tried very hard to get them to show through the hair so that one could see them - the earrings were from another free download. The hair was also a free download.

The scenery you see in the background came with DazStudio so they were already there.

What I want to emphasize here is the dress that this model is wearing. It's called a short-dress and it was available as a different free download (as soon as I find out the creator of this I will post about it here!). With this dress I can conform it to the female character model meaning that the dress will move with the figure - for instance if I change the pose of the model then the dress should conform to the new pose - which it does (for the most part).

Right now I just wanted to show you basically what the dress looks like. I made it a simple solid color to start off with - at least for a start.

However I am reading the tutorial that came with DazStudio and am finding out a lot of very interesting things about being able to change how the dress looks. So far I have experimented with changing the surface / material of the dress with different materials that I already have in my files. Plus I'm experimenting with making NEW materials as well! As you can probably guess my 3d-related files are getting huge!

Like I said I'm still learning this and one of the things that is perplexing me is the format that the material can be saved to. It looks like if I find an interesting material / surface I can save it as a .dsb file but then later I have trouble pulling up that same material file in case I want to use it again. So I'm still trying to learn about .dsb / material / surface files.

Tuesday, December 23, 2008

World Machine!


For all of you Terragen lovers out there I have found a great program that you can use in conjunction with the Terragen program! (Actually I didn't find it - the good folks at Renderosity's Terragen Forum recommended this program.


It is a separate program that lets you create and modify 3D terrains that you can then import in Terragen. You can build some stunning-looking terrains with this program! I'm still learning it myself and you can see my progress so far:

You see, with using the Terragen program you can still create some good-looking terrains like so:


But with the World Machine Program you can also import .bmp files into the World Machine Program and add different "filters to it and get some very good looking effercts.

Here is currently a work-in-progress that I am currently working on:


It's called:

Ancient Ruins!


You can find out more about World Machine (including a free download of the program) by clicking here!

Thursday, December 11, 2008

Vue6 - I Am Still Learning!


As I said before I'm still learning how to use this program. I have also mentioned that I have the Personal Limited Edition and that puts watermarks and the Vue6 logo on all the renders.

I'm getting a lot more interested in this 3d program so I decided to find out how much the real version costs. First I found out that I have the Personal Limited Edition of Vue6 Infinite! To buy the full program costs $695. It is definitely on my "wish list!

To find out more about this program (and also where to download the Personal Limited Edition) just click here.

I'm currently on page 125 of the tutorial and here is how my work looks so far:


I'm currently working with the eco-systems aspect of Vue6 which involves being able to (and create) objects as part of an ecosystem. For instance in the picture above you can see some grass and rocks - all put in using the ecosystem option.

Instead of placing an object one at a time, the ecosystem lets you place as many of an object that you want and it even slightly changes the look of the object so that they all won't look the same!

Friday, November 14, 2008

Vue6 - I Am Still Learning!


I have been playing around with my PLE version of Vue6. I have also been going through the tutorial and am coming to realize just how this program has so many options and features on it!

Like I said I'm still learning but I managed to create a short video - using Vue6 -

The quality isn't 100% but I was in such a rush to get it done that I let it use the poorer quality to make the video.


Here is a render that I made using the Vue6 program. Now I have the Personal Limited edition which puts watermarks and the Vue6 logo on your renders - yeah its a bummer I know - but still the program is still quite usable!

I had actually started this render because I wanted to enter on of the 3d contests but I didn't finish making the render in time.

The cottage I made using Wings3d and then imported it as an .obj file into Vue6. Once I imported the cottage, I then went through the steps of giving materials to the different parts of the cottage. The trees were done in Vue6 - they have a great option for that!

Turning it into a video required some effort but once I get used to the program it should be much easier to do!

Sunday, July 6, 2008

Having Fun With Daz Studio!

Lately I have been having fun with the Daz Studio program! I got it as a free download from the Daz site - I don't know whether its still available as a free download though -

The free download (and it was a HUGE download included its own set of models which included the Victoria3 model along with some fairy-like objects.


Here you can see a model that I made (after some trial and error headaches!) using the Daz3d program.

Now the background I made with Bryce and then I imported that background into the Daz3d program. But everything else you see in this 3d render was from the Daz3d program itself! That includes the hair, clothing and even the darker skin color - they were all models that were either included in the original download or I got them as a free download from Renderosity.com.

This render took a while for me to do!

And there are still yet other things that I can do with this model and the 3d program itself!

About the hardest thing to do is to edit the objects such as the hair and the clothing to get them to look the way that I want them to. But adding (and creating) textures is turning out to be a lot of fun too!

Hopefully I remembered to save the original file so that I can "play" with it some more!


Thursday, April 3, 2008

"Do Not Enter!"


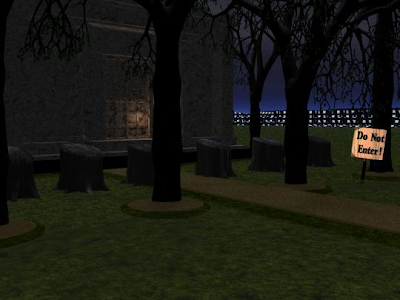
I have always been fascinated by things "gothic" and Bryce is a great program to work on some gothic-looking renders. I have a website called "Everything's Related" which has information and links about things relating to witchcraft and the like. Since I do have an interest in witchcraft, wicca and witches I thought that making some 3d renders would be great!

I made the above picture using Bryce. Even though I didn't think that there were that many objects in the picture it did still take a long time to render. Most of the objects that you see in the picture were made from Bryce except for the tree stumps which were made with a program called "Shapemaker" (I'll post about that program later).

The trees, however, were made in the Bryce program and I think that it makes for a more "spooky" effect if the tree branches are bare. I also like the look of night in these types of renders.

With the Bryce program you can make almost everything that you see in the rendered picture above - except for the tree stumps. You can change how the sky looks, and what colors the sky will be in. You can even add the moon, sun and stars to your render as well. The mausoleum was a 3d object that I was able to download for free from Renderosity.com. The light shining on the mausoleum was also added with the Bryce3d program.

About the hardest thing to do was the "Do Not Enter" sign because I never made a sign before previously. But I did manage to get it accomplished and the text shows through quite clearly.

What is so great about the Bryce program is that even though I have rendered the picture above, I still have the original Bryce file of the picture so that I can work on it some more for things like adding new objects or just general tweaking. Plus I can save the objects in the Bryce library file so that I can use them for other renders.

I can see why so many people enjoy making 3d art!

Monday, March 17, 2008

Editing A Hair Model

I have a 3d hair model that I'm currently "tweaking".

I'm using the hair model on my basic Victoria 3 model that I have adapted to my own look.

Unfortunately the hair that I'm working with is in the model's face and that is what I have been working on.

I'm using the Wings3d program to edit this hair model and so far I have managed to get the areas that were in the model's face removed. There are still some small areas that have to be fixed but for right now I have come to the conclusion that I can paint over these problems when I post-render the picture.

I also had to import the basic Victoria3 model into the same program so that I could see how the hair would look on the model.

I'm still doing some "tweaking" with the hair - like I'm trying to figure out how to add bangs - which I can also do when I post-render the image.

I have even worked on this hair model and then imported the 3d object into Bryce. I was doing that to try and find a good hair texture so that the hair would look more realistic. In Wings3d you can save your 3d object and give it a simple material color - nothing too complicated, just a basic color - and when you import it to Bryce it should import with that material color.

So for right now I'm tweaking the hair model and trying to find a good hair texture to add to the hair object so that the hair looks more realistic.

Wednesday, March 12, 2008

Me?

Below you will see one of my very first (presentable) pictures that I created!

It took me a long time to get this final render but it was well worth it! (It also showed me that if one has patience and takes their time you will learn more about what you are doing!)


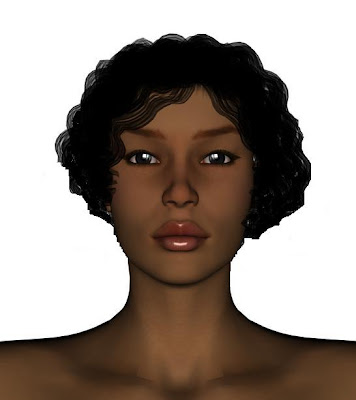
I made this picture using Daz Studio! It was a free download and I'm glad that I was able to get it! The free downloaded included some Victoria 3 models and poses and I was able to convert the skin tone to one that matched my own! I was able to do this after downloading some free Daz-Studio related items for the V3 model.

Daz Studio is a very powerful program. Besides already including models that you can work with you can also change the model itself! You can make them fatter or skinnier or even change the features of their face so that they can look cat or feline-like. You can change the poses of your model(s) too!

The hair that is included in the picture (and looks very close to my own hair) is from a free hair model that I got from Renderosity.com - a good place to get some free 3d objects!

Now working on this model of myself also reminds me to save a working copy of this model in Daz Studio so that I can work with it over and over again. That's one very important lesson to learn when you are doing 3d work and that is to save copies (and backups) of your work! - I learned that the hard way!

Once I finished creating this model in Daz Studio I saved it to my 3d program (Gimp) and did a lit post-editing to clear up some of the areas - especially the hair!

So what do you think?